Category: Gardening

  • Manure: Some Facts

    Things I know about manure through trial and error – lots and lots of error.

    The Scoop on Poop

    Manure that is old, 5 or more years old is well composted. It is cool and groovy. Garden stores sell it. It is marvelous stuff. Unfortunately, most manure is not old.

    Hot or Fresh Manure

    A Natural Weed Killer

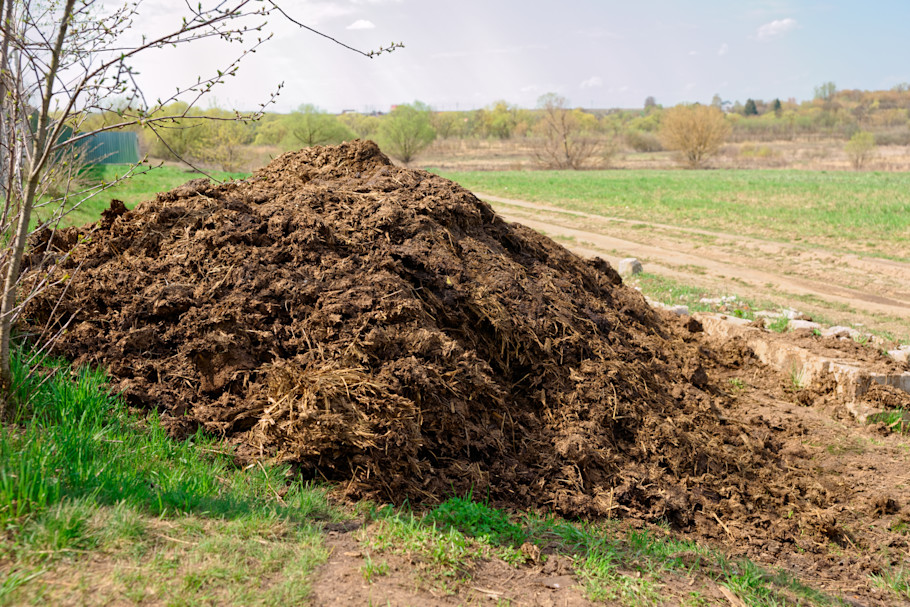
    1. Hot/Fresh manure has a high nitrogen count. I use fresh horse manure to kill weeds. Applied regularly it kills Canadian Thistle. A five gallon pail of freshish horse manure on cut thistle every other month will kill it.
    2. Hot manure is a wonderful addition to garden paths. A 4-6 inch layer of manure covered with straw sheets will stop the weeds.
    3. Animals eat grain. North American grain is treated with glyphosate, commonly known as Roundup. Glyphosate builds up and leaves behind aminomethylphosphonic acid, which destroys microbes in soil.
    4. In short, Hot/Fresh manure should be used to kill weeds and kept far away from the things you eat.
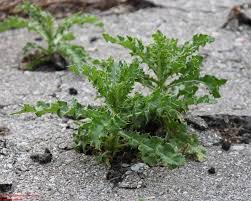
    My Nemesis, Canadian Thistle.
    Image courtesy of
    https://abinvasives.ca/fact-sheet/thistle-canada/

    The Manure Test

    Concerned about that aged manure you bought from your local organic sheep farmer? Test it.

    • Mix the manure with your garden soil. Fill a small pot with the mixture. Plant a bean in it. Write manure and garden soil on the pot.
    • Mix the manure with potting soil. Plant a bean in it. Write manure and potting soil on the pot.
    • Fill a pot with your garden soil. Plant bean in it. Write garden soil on the pot.
    • Fill a pot with potting soil. Plant a bean in it. Write potting soil on the pot.
    • Grow.
    • If the beans leaves are wrinkled or curl in it is being affected by an herbicide. If it grows, but is spindly and looks unhealthy, then the soil might be nutrient depleted or unbalanced. If it looks awesome – good job! Yes, anyone can grow a bean. We did it in school. Beans are sensitive little dudes. They are the litmus test veg.
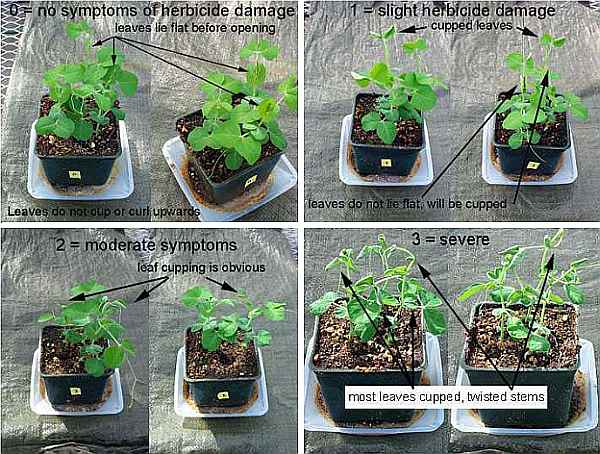
    Image courtesy of Easy Digging – Full explanation of Bean Test

    If your bean doesn’t look robust, and it was in your garden soil don’t freak out.

    If the soil crumbles easily, add some of that aged manure or compost to it. Aged compost or manure can be bought in the spring at schools, city compost centre, and zoos.

    If the soil is sticky and has a high clay content, add sand, straw, and compost to it, to give it more air pockets. Roots need air.

    If the soil won’t form a ball, it might have a very high sand content. Add more black dirt and compost.

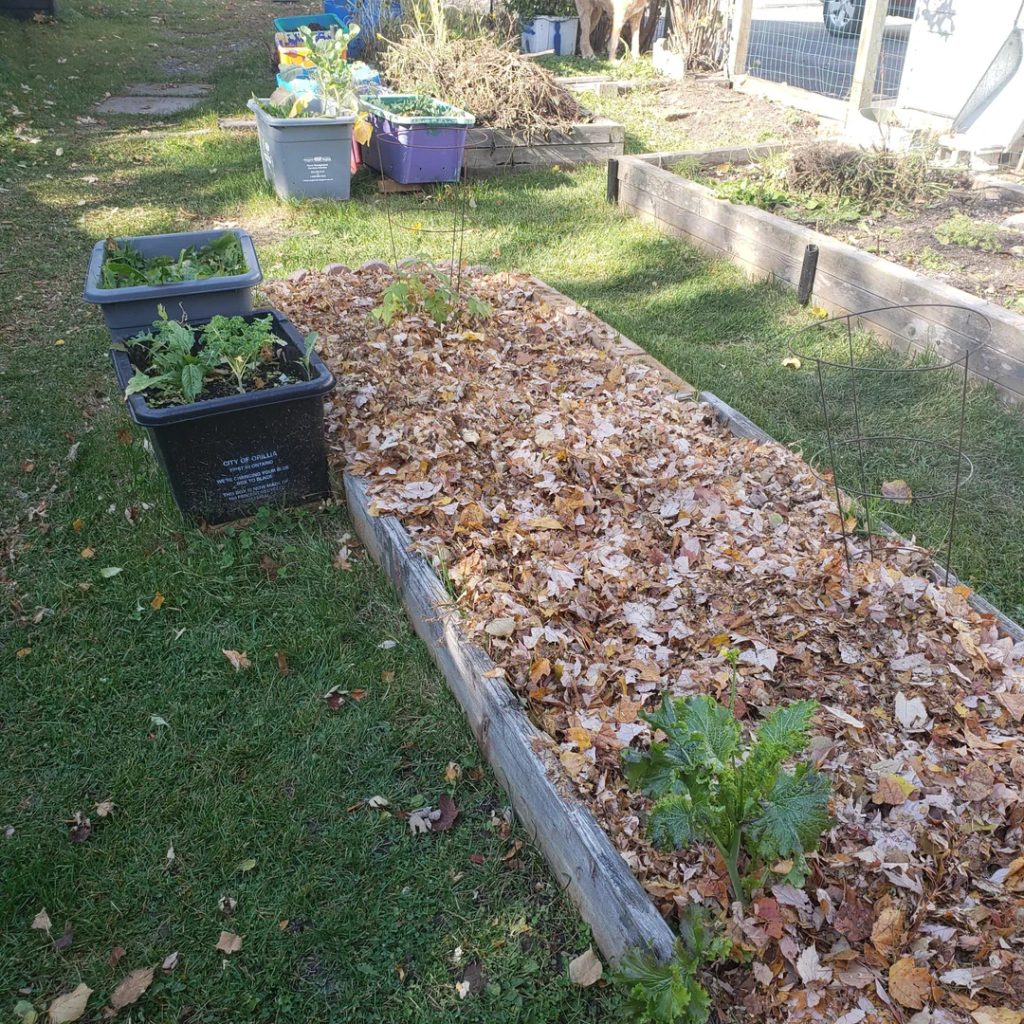
    Compost is the solution to 90% of most garden woes. Cover your garden every fall under a thick layer of leaves. In the spring mix those leaves into the garden soil. That’s composting the cheap and easy way.
    Next up – Planting for your soil type!

    Did you know that no matter what your soil is like, salty, alkaline, sticky gumbo clay, or covered in moss there’s a plant out there who will love it, and heal it? Stay tuned for more.
  • Garden 2026

    It is gardening season once again. The snow has finally departed and the days are warm.

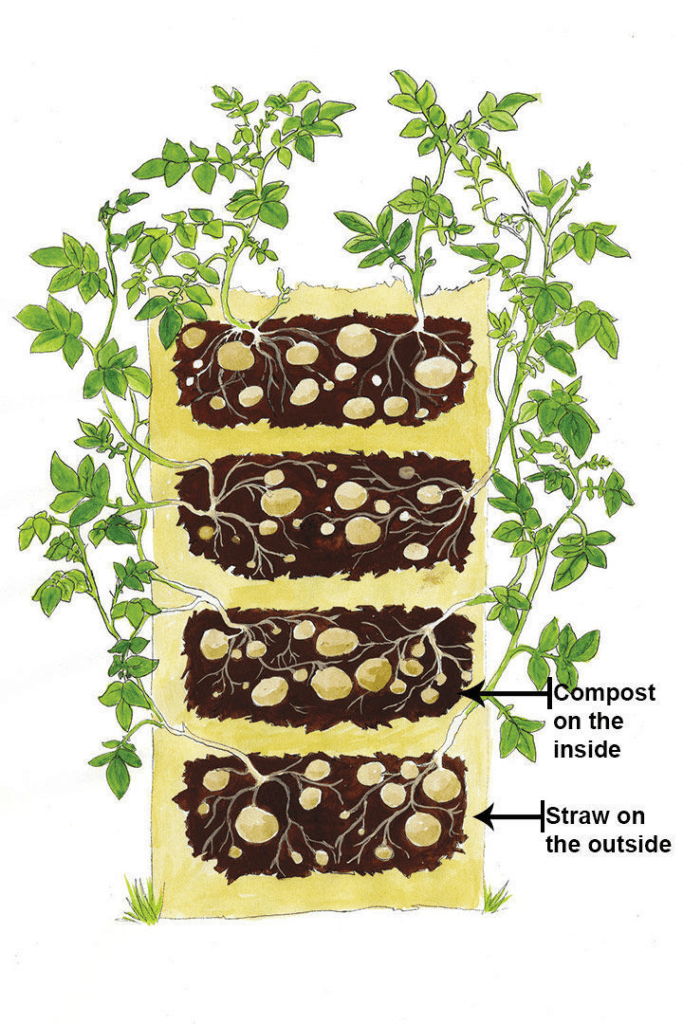
    Potato Tower, Reduce the amount of straw on the exterior, and add a deep watering pipe. Full instructions below. Image courtesy of Fine Gardening

    Potato Towers Round 2

    Last year’s potato towers did not do well. Between the slugs, substituting dry leaves for straw, and uneven watering the crop was sufficient but far from terrific.

    This year, we have tons of straw bales. Yeah! Last fall’s leaves went into the compost producing many wheelbarrows of soil.

    Weed Supression

    1. 4 inch layer of horse manure
    2. 2-4 inches of leaves and twigs (cleaning up my neighbour’s lilac bushes)
    3. 4-6 inch mat of straw sheets (how straw comes out of a bale).

    Planting instructions

    1. Lay potato seeds around ring every 10 inches.
    2. Build a light nest of straw around outside of ring. Fluff up a straw sheet. Nest is thin enough for plants to grow through and thick enough to hold soil.
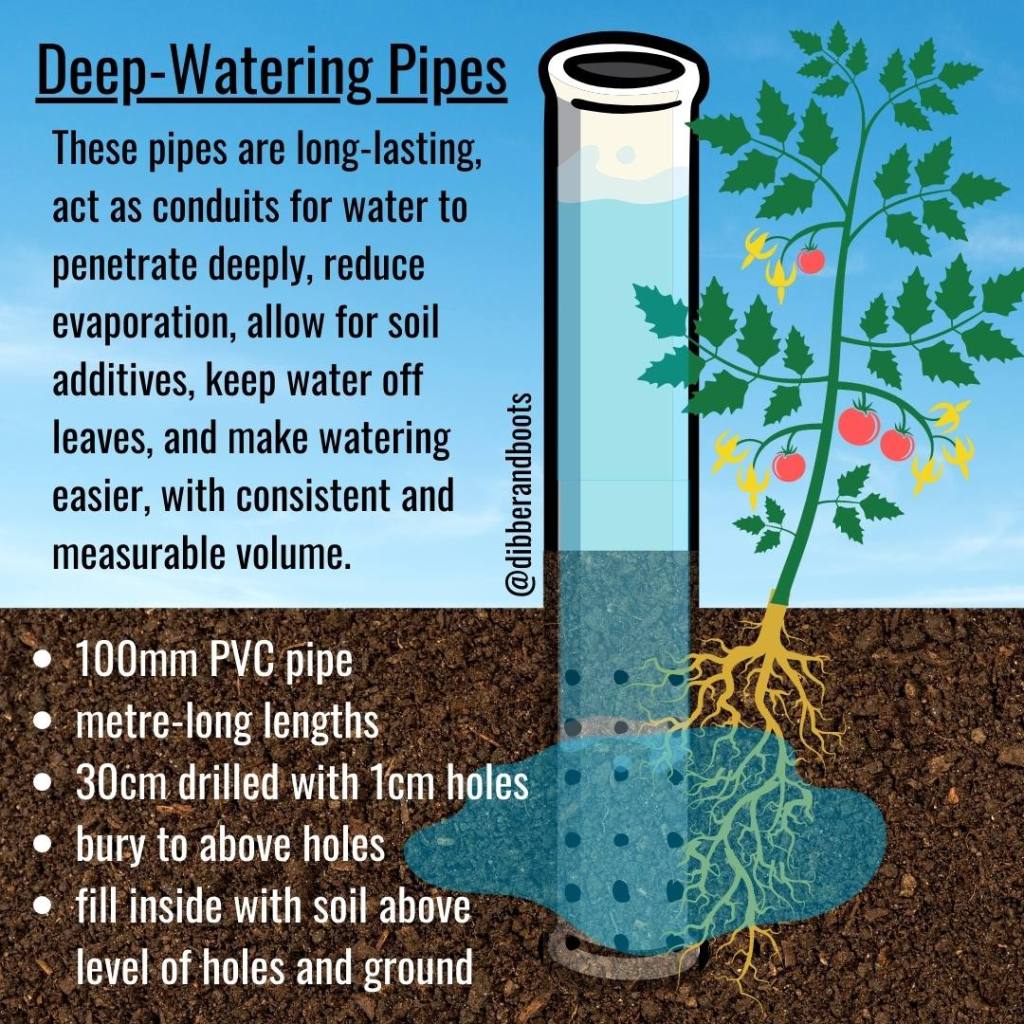
    3. Put a deep-watering pipe in centre.
    4. Add 8 inches of soil/compost mix.
    5. Water the layer
    6. Repeat steps 1-5 until desired height is reached.

    For instructions on building rings see early Potato Tower Post.

    Image courtesy of Dibber and Boots – Great Site! https://dibberandboots.com.au/deep-watering-pipes-jan2021/

    Get Away Slug!

    Slugs avoid strongly scented flowers!

    Nasturtium, Evening Stocks, Alyssum, Lavender, Geranium, Zinnia, and Snapdragon are flowers that slugs stay away from. Stuff your tower with these flowers and ring your tower with a colourful, scented display to keep the slugs away. The butterflies will thank you for it.

    Nasturtiums are easy to grow and bloom all summer long, late into the fall. Dry the seeds for next year’s plants.

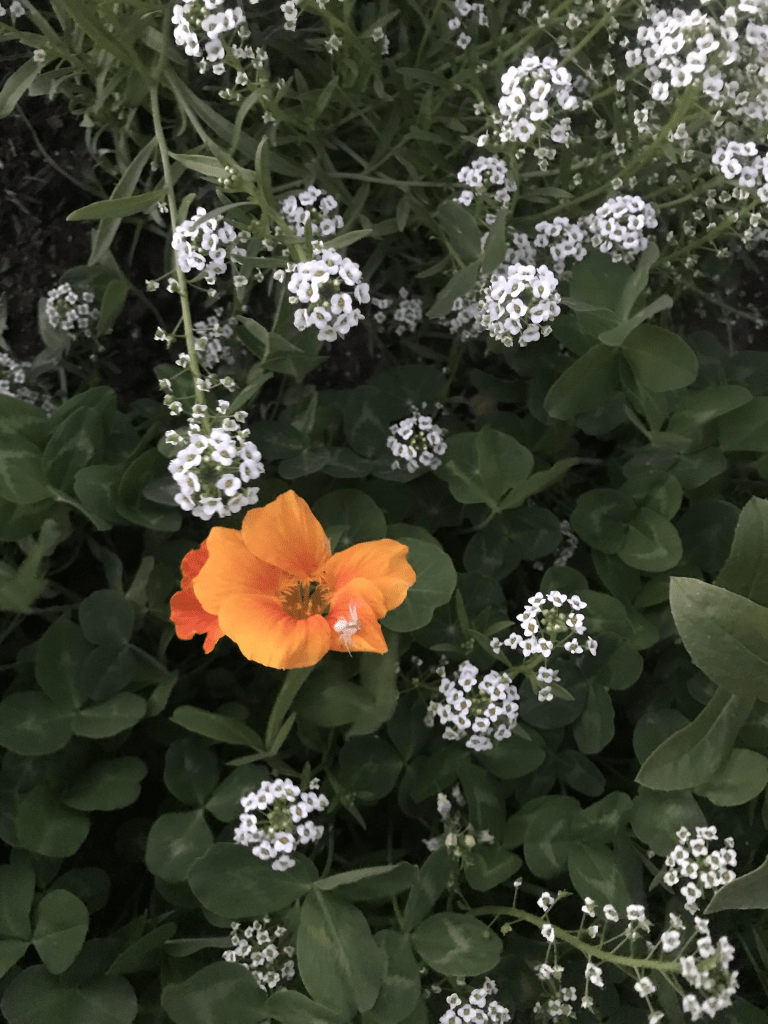
    Nasturtium blooming amidst white alyssum

  • Zone 3 Trees and Bushes

    Zone 3 has temperatures that range from -40 to +40 celcius, and winds up to 100 km/h. Every tree or bush is rated for zone 3.

    Why trust me?

    My dad and his bestie owned a tree farm when I was a teen. His bestie’s family owned one of the largest nurseries in Central Alberta and taught my Dad, who taught me.

    The two middle cedar trees are dying because they were not planted within 3 days of purchase. They may have dried out during transportation to the store. All Brandon cedars were planted the same day.

    How to Plant a Tree

    • Dig a hole slightly larger than the size of the pot or root ball.
    • Fill it with water, wait for water to drain, refill with water. If after 15 minutes hole is dry, refill with water. Continue until hole holds water for 15 minutes.
    • Add in a handful of bone/blood meal or alfalfa pellets.
    • Take tree out of pot, unwrap burlap from root ball.
    • Break apart the roots a bit, they should still have soil on them.
    • Place in watery hole.
    • Backfill with good soil.
    • Tamp around the tree with your feet to remove air pockets.
    • Cover base of tree with 2-4 inches of sawdust or wood chips. Keep this 2 inches away from the tree’s trunk.
    • Water weekly, more depending on weather and soil conditions.

    Sunlight

    6+ hours of direct light

    • Trees: White Oak, Norway and Silver Cloud Maple, Lilac, Wichita Blue Juniper, Ponderosa Pine, Apples, Plums, Dwarf Cherry varieties, Apricots, Pears
    • Bushes: Ninebark, Caragana, Conteaster, Haskap, Currants and Gooseberries, Sour Cherry, Chokecherry, Pin Cherries, Elderberries, Double Flowering Plum

    6 hours of direct sunlight

    • Most trees need 6 or more hours of direct sunlight
    • Bushes: Raspberries, Saskatoons, Nanking Cherry, Cinquefoil

    Low Light, less than 6 hours of direct light

    • Low light shrubs include Dogwoods, blueberries, cranberries (viburnums)
    • Flowering bushes like Hydrangeas, rhododendrons, astilbe and azalea prefer shade.

    Wind

    Not every tree is okay with wind, at least until they are well-established.

    Planting a Shelterbelt and Windbreak

    • Lilacs, Amur and Manitoba Maples, Spruce, Conteaster, and Caragana are good windbreak and shelter belt trees.
      • Note Caragans disperse a toxin through their root system that prohibits anything from growing near it.

    Need Protection

    • Cedars and pyramid junipers need shelter from wind while establishing. Best planted along a fence.
    • Fruit trees can sustain damage during high winds. Prune yearly to minimize damage.
    • Many willows and elms will “self prune” during heavy winds. Yearly pruning is recommended.
      • To prevent dutch elm disease, check with your region for elm tree pruning times.

    Salt

    Planting near your driveway or sidewalk? Chose a tree a drought resistant, high salt tolerant tree or bush. These are usually drought resistant trees and bushes planted by cities along boulevards. Here are some varieties.

    • Some varieties of Elm, Juniper, Austrian Pine, Hawthorne, White Oak, and Thornless Honey Locust

    Soil Type and Recommendations

    I classify soil as

    • Boggy, wet, with lots of peat
      • Birch, Cranberry, Weeping Willow, Tamaracks, White Cedar, Dogwood
    • Claylike, sticky, cracks when dry, sucks up water quickly
      • Willows, Aspens, Ninebark, White Cedar, Potentilla, some Linden and Ash trees
    • Highly acidic due to nearby fir trees
      • Mountain Ash and Ash trees, Saskatoons, Blueberries, Amur Maple, White spruce, Balsam Poplar
    • Rich and well draining
      • Anything you want except the plants that need wet, boggy conditions.

    Soil can be faked.

    Planting into straight clay is hard on your trees, shrubs and perennials. To give your plants the best start dig a hole twice the size needed. Fill the hole halfway with a mixture of peat moss, perlite, sand, and black dirt before filling with water. Add pine needles for acidic soil. Your plants will thank you.

    Place the clay around the foundation of your house. It prevents leaking.

    Proximity to House, Sewage, and Water Lines

    Roots can cause big problems. For instance the root system of poplars and firs is approximately the same size as the tree is tall.

    Invasive Root System – min. 35 feet from foundation and water lines

    • Trees: Aspens, Poplars, American Elm, Manitoba Maple, Willows
    • Shrubs: Double Flowering Plum, American Hazelnut, Red-osier Dogwood.

    Non-invasive Root System, Foundation Friendly

    • Trees: Amur Cherry, Pagoda Dogwood, Brandon Cedar (very common), Lilacs, Crabapples, Ornamental Pear, Mayday, Hawthorne, Chokecherry, Common Juniper, Apple, Plum, Amur Maple, Dwarf Alberta Spruce
    • Shrubs: Saskatoon, Rocky Mountain Juniper, Elderberry, Arborvitae, Azalea, Hydrangea.

    Summarize

    Look at the place you want to plant a new tree or a small orchard/food forest. Note hours of sunlight, wind, and soil to make a better choice. Lastly, are you a decent distance from water lines and house foundation?

    Once you got that all figured out talk to your local tree farm nursery start looking at plants online and in-person. Work out your financial, physical effort, and time budget before you spend any money.

    Be patient. Creating a food forest or landscaping a yard takes time. As things grow you might be surprised to discover that your first ideas won’t work because the haskap is enormous and the berries are delicious.

    Thanks for reading!

  • Zone 3 Trees and Bushes

    Zone 3 has temperatures that range from -40 to +40 celcius, and winds up to 100 km/h. Every tree or bush is rated for zone 3.

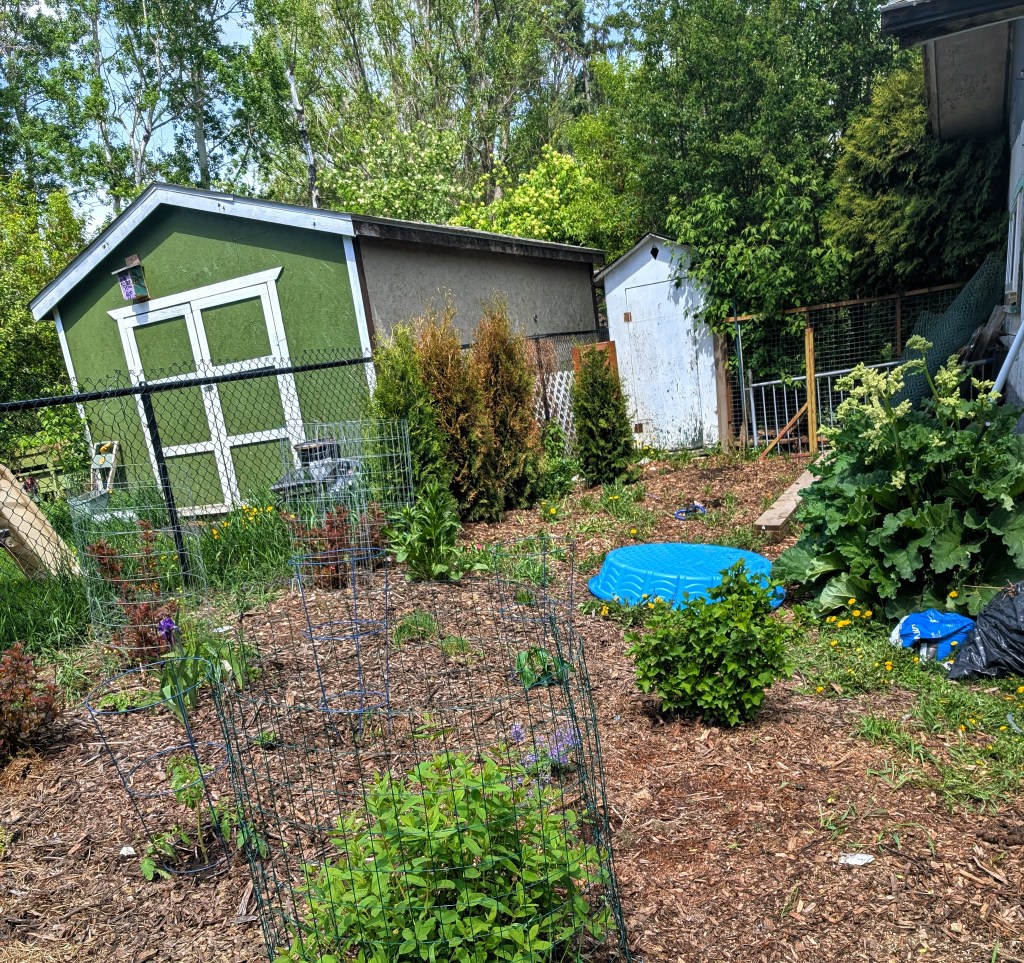
    Picture of the backyard in progress, haskap, black currant, ninebarks, horseradish, bearded iris, 4 cedar trees.

    Why trust me?

    My dad and his bestie owned a tree farm when I was a teen. His bestie’s family owned one of the largest nurseries in Central Alberta and taught my Dad, who taught me.

    The two middle cedar trees are dying because they were not planted within 3 days of purchase. They may have dried out during transportation to the store. All Brandon cedars were planted the same day.

    How to Plant a Tree

    • Dig a hole slightly larger than the size of the pot or root ball.
    • Fill it with water, wait for water to drain, refill with water. If after 15 minutes hole is dry, refill with water. Continue until hole holds water for 15 minutes.
    • Add in a handful of bone/blood meal or alfalfa pellets.
    • Take tree out of pot, unwrap burlap from root ball.
    • Break apart the roots a bit, they should still have soil on them.
    • Place in watery hole.
    • Backfill with good soil.
    • Tamp around the tree with your feet to remove air pockets.
    • Cover base of tree with 2-4 inches of sawdust or wood chips. Keep this 2 inches away from the tree’s trunk.
    • Water weekly, more depending on weather and soil conditions.

    Sunlight

    6+ hours of direct light

    • Trees: White Oak, Norway and Silver Cloud Maple, Lilac, Wichita Blue Juniper, Ponderosa Pine, Apples, Plums, Dwarf Cherry varieties, Apricots, Pears
    • Bushes: Ninebark, Caragana, Conteaster, Haskap, Currants and Gooseberries, Sour Cherry, Chokecherry, Pin Cherries, Elderberries, Double Flowering Plum

    6 hours of direct sunlight

    • Most trees need 6 or more hours of direct sunlight
    • Bushes: Raspberries, Saskatoons, Nanking Cherry, Cinquefoil

    Low Light, less than 6 hours of direct light

    • Low light shrubs include Dogwoods, blueberries, cranberries (viburnums)
    • Flowering bushes like Hydrangeas, rhododendrons, astilbe and azalea prefer shade.

    Wind

    Not every tree is okay with wind, at least until they are well-established.

    Planting a Shelterbelt and Windbreak

    • Lilacs, Amur and Manitoba Maples, Spruce, Conteaster, and Caragana are good windbreak and shelter belt trees.
      • Note Caragans disperse a toxin through their root system that prohibits anything from growing near it.

    Need Protection

    • Cedars and pyramid junipers need shelter from wind while establishing. Best planted along a fence.
    • Fruit trees can sustain damage during high winds. Prune yearly to minimize damage.
    • Many willows and elms will “self prune” during heavy winds. Yearly pruning is recommended.
      • To prevent dutch elm disease, check with your region for elm tree pruning times.

    Salt

    Planting near your driveway or sidewalk? Chose a tree a drought resistant, high salt tolerant tree or bush. These are usually drought resistant trees and bushes planted by cities along boulevards. Here are some varieties.

    • Some varieties of Elm, Juniper, Austrian Pine, Hawthorne, White Oak, and Thornless Honey Locust

    Soil Type and Recommendations

    I classify soil as

    • Boggy, wet, with lots of peat
      • Birch, Cranberry, Weeping Willow, Tamaracks, White Cedar, Dogwood
    • Claylike, sticky, cracks when dry, sucks up water quickly
      • Willows, Aspens, Ninebark, White Cedar, Potentilla, some Linden and Ash trees
    • Highly acidic due to nearby fir trees
      • Mountain Ash and Ash trees, Saskatoons, Blueberries, Amur Maple, White spruce, Balsam Poplar
    • Rich and well draining
      • Anything you want except the plants that need wet, boggy conditions.

    Soil can be faked.

    Planting into straight clay is hard on your trees, shrubs and perennials. To give your plants the best start dig a hole twice the size needed. Fill the hole halfway with a mixture of peat moss, perlite, sand, and black dirt before filling with water. Add pine needles for acidic soil. Your plants will thank you.

    Place the clay around the foundation of your house. It prevents leaking.

    Proximity to House, Sewage, and Water Lines

    Roots can cause big problems. For instance the root system of poplars and firs is approximately the same size as the tree is tall.

    Invasive Root System – min. 35 feet from foundation and water lines

    • Trees: Aspens, Poplars, American Elm, Manitoba Maple, Willows
    • Shrubs: Double Flowering Plum, American Hazelnut, Red-osier Dogwood.

    Non-invasive Root System, Foundation Friendly

    • Trees: Amur Cherry, Pagoda Dogwood, Brandon Cedar (very common), Lilacs, Crabapples, Ornamental Pear, Mayday, Hawthorne, Chokecherry, Common Juniper, Apple, Plum, Amur Maple, Dwarf Alberta Spruce
    • Shrubs: Saskatoon, Rocky Mountain Juniper, Elderberry, Arborvitae, Azalea, Hydrangea.

    Summarize

    Look at the place you want to plant a new tree or a small orchard/food forest. Note hours of sunlight, wind, and soil to make a better choice. Lastly, are you a decent distance from water lines and house foundation?

    Once you got that all figured out talk to your local tree farm nursery start looking at plants online and in-person. Work out your financial, physical effort, and time budget before you spend any money.

    Be patient. Creating a food forest or landscaping a yard takes time. As things grow you might be surprised to discover that your first ideas won’t work because the haskap is enormous and the berries are delicious.

    Thanks for reading!

  • Potato Towers

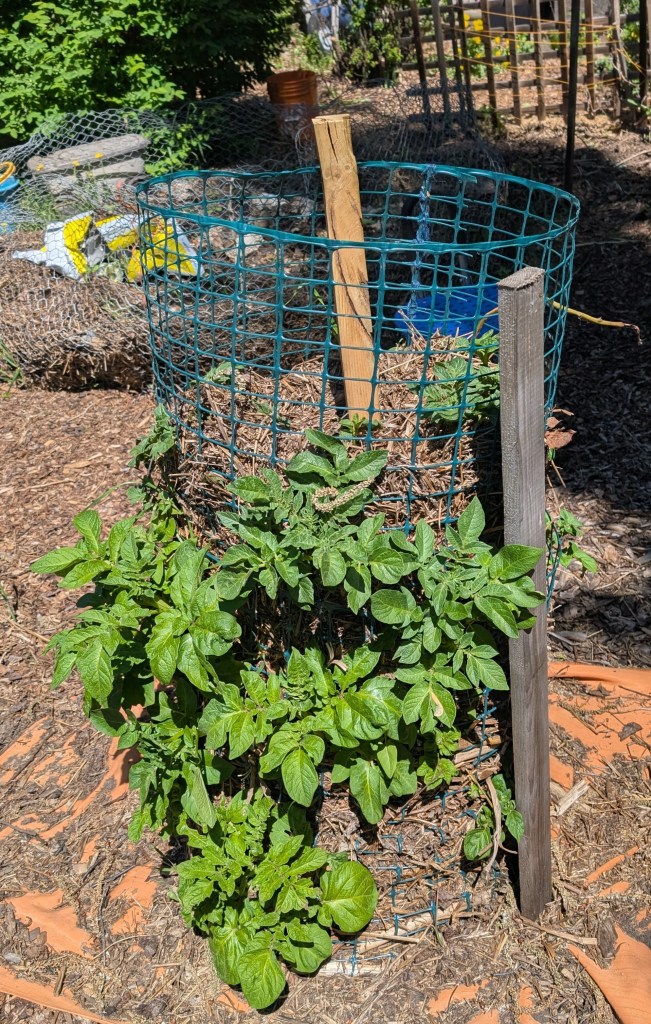
    3×4 foot tall Potato Tower made with plastic snow fencing

    Potato Towers are a cool way to grow a lot of potatoes in a small space without the need to dig, weed, hill potatoes. It is a disability friendly way to grow spuds!

    YouTube has videos on building potato towers. Here are the tips the videos don’t include.

    Potato tower dimensions

    • 3 ft X 4 ft,
    • 2 ft X 3 ft
    • Measure mesh needed calculate tower circumference (rx2)x3.14
    • (2×18)x3.14=113 inch circumference or 9.4 feet of mesh for 3 ft round tower
    • (2×12)x3.14=75 inch circumference or 6.3 feet of mesh for a 2 ft round tower

    Materials

    1. Mesh, chose either
      • Wire mesh with min. 2 inch square openings. Cut with tin snips , or other wire cutters. Chicken wire will work as long as you wear heavy gloves, it’s really pokey.
      • Plastic snow fencing – cut with scissors.
    2. Twine
      • to sew/weave tower together and hold watering tube in place
    3. Dried Leaves , 2-4 garbage bags worth
    4. Soil or Compost/soil mix, 2-4 bags or one heaping wheelbarrow
    5. Chaff or straw, 1/2 a square bale
      • Make your own nutrient rich chaff using dry stalks from last year’s plants. Wrap stalks in polyester cloth. Stomp or repeated drive over stalk bundle until stalks are broken into 4-6 inch pieces.
      • Straw has no nutrients.
    6. Bone or Blood meal or soaked Alfalfa pellets
    7. Potatoes – 4-5 potatoes per layer.
      • Use seed potatoes, old store potatoes that are sprouting. *To grow store bought potatoes wash with soapy water to remove growth inhibitor. Dry, and place in cloth bag or cardboard box for 3-6 weeks.
    8. Polyester material at least 6 inches wider than towers.
      • Polyester will not rot and can be used for years. I use a cheap tablecloth.
    9. Garden stakes
    10. 1/2 inch PVC tube with 3/16 inch holes drilled up and down the pipe every 4-6 inches, capped at one end.

    How to Build Potato Tower

    1. Use twine or yarn to sew/weave edges of tower together. 
      • I start with a short tower then secure the second tower to it when the short tower is full.
    2. Pick a sunny spot to plant tower.
      • Towers can be place in large containers, on top of mulch, or on the lawn.
    3. Set tower on polyester material
    4. Stake down material
    5. It is ready to be planted!

    How to Plant Potato Tower 

    1. Loosely line the inside of the tower with 6-8 inches of straw or chaff. Make it loose, you can see light through it. 
    2. Fill with 4-6 inches of leaves. 
    3. Sprinkle leaves with bone meal/wet alfalfa pellets. 
    4. Place 4-5 potatoes around the edges of the tower.
    5. Cover with enough dirt to cover the potatoes. Not a lot of soil is needed.
    6. Water gently, just so the soil is damp. Add more soil if needed.
    7. Place watering tube vertically in the centre of tower. Use twine or cotton string to hold it in place.
    8. Repeat planting process until the tower is full.
    9. Check frequently that tower is standing straight.
    10. Water using the tube and soak all the outside edges of the tower. Tower is properly soaked when water runs out the sides. Big towers can hold 45 min. of water once or twice a week depending on the weather. 
    11. Potatoes are ready to harvest in 90-120 days.

    Harvesting Potato Tower

    1. Ideally harvest after 90-120 days. We harvested one year in Oct. after it had snowed. The spuds did not freeze in their tower.
    2. Harvesting supplies. Sacks or buckets to hold potatoes. Small shovel. Wheelbarrow or buckets to hold soil. Disability option: stool or garden seat.
    3. Cut all the potato tops from the tower. Compost or use as chaff for next year.
    4. Empty each layers of the tower by hand.
      • Everything that is not a potato is saved for next year’s planting.
      • Notice the leaves are all now soil!
    5. Unclip top tower if you used 2 towers on top of each other. 
    6. Halfway down the second tower, lift off the second tower off, or undo the sides. 
    7. Continue harvesting.
    8. Potatoes store better if they are dirty.
    9. Store dirty potatoes in a cool, dark, dry place.
    10. Put everything away. 
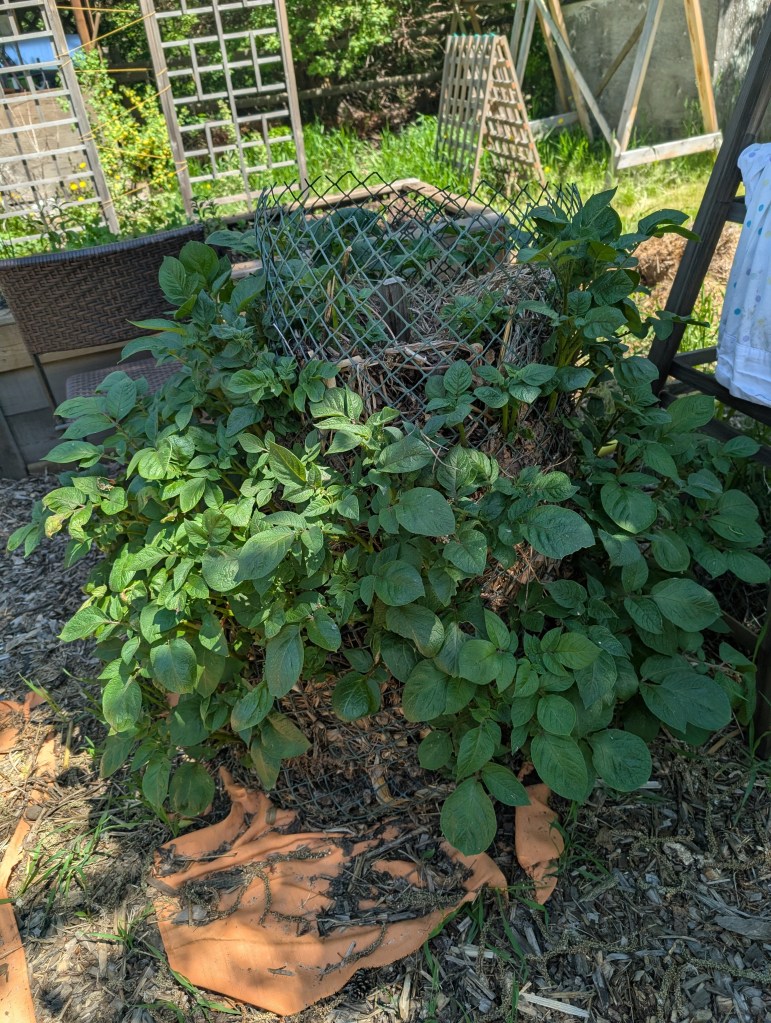
    11. That sheet/tablecloth you put underneath the towers will catch most of the dirt. Otherwise you get tower humps.

    Potato tower hump, 4-6 inches of topsoil

    Disability and Family Friendly

    Potato towers not only save space they are a disability friendly way to grow spuds.

    • Can be grown anywhere that is sunny.
    • No bending!
    • Can be planted and harvested while sitting.
    • Children enjoy helping with this project.
    • Big harvest in a small space.

    Tips

    1. Take your time and take frequent breaks. 
    2. Ask for help. If you share the crop your friends and the curious will help.
      • Feed and water your helpers.
    3. Rather than bending or kneeling, use a plastic foot stool, garden chair, or get the neighbour’s young child to plant/pick the low stuff. Permission to dig in dirt appeals to young children. 
    4. Water in the morning or evening. 
    5. Use a calendar to note when you planted the potatoes.
    6. Optional, feed your potatoes a gallon of compost tea every 2-3 weeks after leaves poke out of the side.

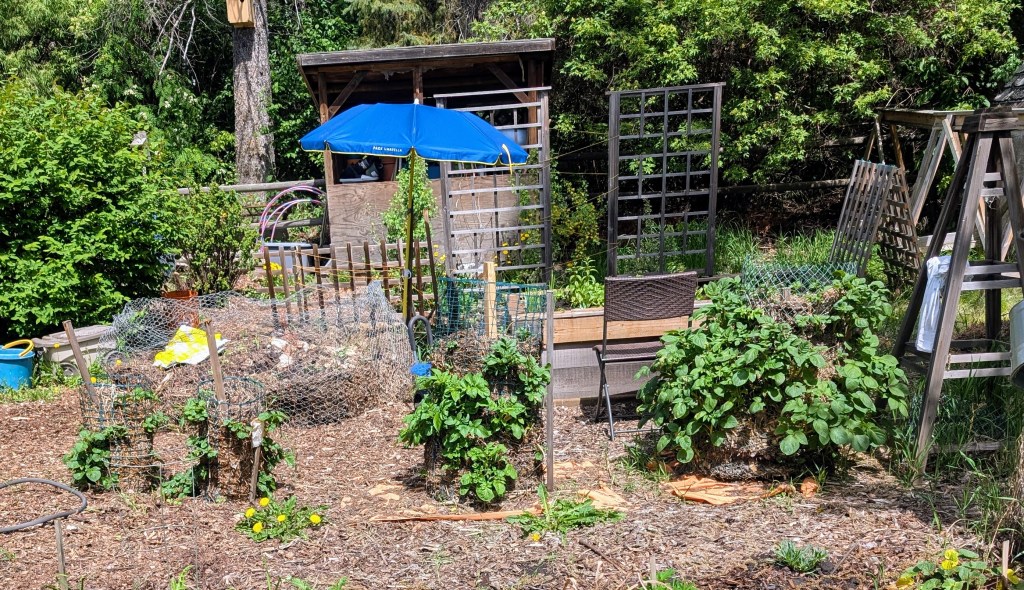
    Potato towers in the garden.

    I have a no-till garden. It is mulch with raised beds, potato towers and perennials.